Wrightlines Rustons:
In autumn 2015 I finally got some free time to progress one of the many 014 loco’s planned for Tony’s Forest. I had a number in the pipeline but these Wrightlines Rustons were the easiest to get started. They are inspired by ones that I saw on the NGRM forum and use Bullant drive units (now, sadly no longer available).

Wrightlines 44/48hp Ruston test fitted on a BullAnt motor bogie
The hardest bit was working out what to cut out and how to mount the Bullant.

Wrightlines 44/48hp Ruston test fitted on a BullAnt motor bogie
The 44/48 HP Ruston has a 2 axle BullAnt Power Bogie, Wheel Size 10.5mm Code 110 NS Disc, Track Gauge TT at 14.2mm, Mashima Motor, Gearbox Reduction Ratio 60:1 with Flywheel, a 20mm Bat Wing Mounting Fixed Bolster Attachment, 24.5mm wheelbase with a ‘special’ 8.4mm overhang of the gearbox. The 33/40 HP Ruston chassis is to the same specification but with a standard (no overhang) gearbox and no fly wheel.
I am really pleased with both chassis, particularly when compared to some of the small kit-built chassis that I have struggled with (due to ageing eye-sight and competence).

Wrightlines 33/36hp Ruston with cab.
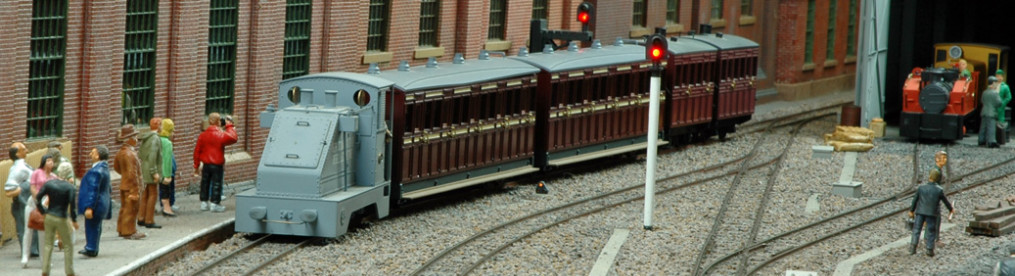
I must admit that I am pretty pleased with this Wrightlines 33/40 HP Ruston. It has a shorter and lower bonnet that the 44/48 HP unit so needed a standard Bullant but without the flywheel. I didn’t think there was enough room to get the flywheel in as well. Consequently it doesn’t run quite as well as the other Bullants but it often handles the quarry train along with the other Wrightlines Ruston. Their weight helps them manage the loaded wagons. The Chinchilla dust that I use to fill the wagons in the quarry might not weigh much but the additional load makes the train difficult for some of the lighter locos to handle. The sharp curves into the quarry limits loco access to the smaller 4 wheeled diesels or battery locos.

Wrightlines 44/48hp Ruston bonnet on left and smaller 33/36hp bonnet with cab on the right.
This shows the difference between the longer 44/48 HP bonnet (on the left) and the shorter 33/40 HP bonnet (on the right).

Wrightlines Rustons test fitted on BullAnt motor bogies
And how the Bullant units fit.

Wrightlines 44/48hp Ruston bonnet on left and smaller 33/36hp bonnet with cab on the right.
Like many of my early loco builds, these two Rustons have took far longer than they should have done to get finished. I finally got round to painting them in July 2019, about 5 years after construction started. They are both very nice runners and being white metal have plenty of weight so they suit my rough track. However, both have quite long overhangs which means that the couplings have to have some side movement.
David Malton Ruston:
I picked up one of David Malton’s Rustons from Chris Ward at the 2015 M5-M50 show. I thought I could cut off the driver’s head and replace it. Then I thought I could shape the driver’s body a bit:

3d printed Ruston body from Chris Ward complete with the driver and seat. I had started to shave some of the more angular bits off the driver before I decided to remove him completely.
but I wasn’t really satisfied. So:

3d printed Ruston body with the driver and seat removed. I accidentally broke the brake lever too.
I had a spare seat from a Nonneminstre kit and a new whitemetal driver to add some weight. There were some delicate bits on the body like the brake lever and quadrant which I ham-fistedly broke before I had even though about removing the driver. I replaced the lever with a bit of wire which I tried to thin down by filing flats on opposite sides whilst keeping the round section at the top to simulate the handle. I did something similar with the gear lever but forgot that it should have a ‘joggle’ in it. I left mine plain as it is now firmly fixed and lines up with the drivers hand.
This was designed to go on a KB Scale chassis but I decided to use one of Tim Crockford’s 3d printed chassis instead.
There were separate buffer beams and engine/exhaust, but I replaced the engine part with a block of whitemetal as the body is quite light and I felt it would benefit from some more weight. I decided to fit my engine weight to the underside of the bonnet so that I can easily extract the chassis for maintenance and oiling.
I filled the spaces under the gearbox housing with lead and added a couple of strips at each end which I hoped wouldn’t be too noticeable when painted. The whole loco was well balanced when the driver was fitted although, as with most of my small 3d printed locos, it is still a bit light.
David’s model is very smartly finished with painstakingly applied lining. Mine is much more modest, primarily due to my lack of ability!
Tebee Ruston Proctor:

At a small show in May 2018 I was admiring an O9 Ruston Proctor built by Bill Flude from a 3d printed body by TeeBee (Tom Bell). A quick measure with a ruler suggested that I could just squeeze in an O14 chassis. However, it proved to be just a bit too tight so I ended up adding new frames to suit another Bullant chassis. Again I seemed able to finish this ahead of some of the longer term motive power projects.
Roy C Link/KB Scale Ruston LBT:
Another long term project was a Roy C Link (now KB Scale) Ruston LBT. Although this came with a chassis I had been struggling to get it to work as I wanted. I think I fiddled with it too much as I just seemed to make matters worse. Then I saw the results that Tim Crockford was getting with his own design of 3d printed chassis block. A quick discussion with Tim resulted in a chassis block to suit the LBT kit and away I went.
I finished this loco in time for the first show and it runs permanently coupled to a skip with a 5mm long link from metal strip. These run on the quarry feed track which has some savage curves and the link is required to provide enough side movement so that neither skip not loco fall off the track. I did try two skips but even with a fixed link between them they just couldn’t cope with the sharp radius curves. I have tried to be restrained with the weathering as the loco would only have been a few years old for the time period that I am modelling (the late 1950’s/early 1960’s).

Locos n Stuff Ruston:
There was more loco lockdown madness in January 2021. This time a Locos n stuff larger diesel bogie to go under one of Mark’s 3d printed Ruston bodies.
It was quite easy to assemble with the only tricky bit for me being cleaning out the small locating slots in the etched sides. I found a small flat blade jeweller’s screwdriver was just the thing for that. I did try a bit of scrap from the etch but it kept bending.


I wasn’t sure how visible the layshaft pulley would be so I decided to blacken it along with the motor pulley and flywheel. Mark’s instructions also suggest gluing the motor onto the bed-plate but I decided I would try a restraining wire. The wire is a bit thick as I couldn’t find the thinner copper wire that I know I have somewhere.


The body looked straightforward but I still managed to mess things up a bit. The instructions said that the base is prone to forming an arc and to straighten it out if required by warming in hot water and bending to shape. This worked until later on…. For painting, the instructions said give the body parts a good wash in detergent and that the slight stickiness will not affect painting. There were a few printing marks which I wanted to smooth out and I struggled with the slight stickiness so I thought I would place the parts in sunlight. This cured the stickiness and helped with the sanding down of the print marks but the base started bending again. Despite my best efforts with hot water the bend kept coming back so I partially cut though the frame which sorted it. One or two parts needed a bit of filling and smoothing and I thought everything was okay, however when I had painted it and let it cure there were a number of print marks that re-appeared, almost as if the material had a ‘memory’ or the filler was shrinking. I have not encountered this before and I suspect it is something to do with my ignoring the instructions. I have tried ‘stippling’ a layer of paint to try to break up the surface and disguise the marks. Overall, I think I will get away with it as the stock is so hard to see on Tony’s Forest, just so long as I don’t tell anyone……
Not one of my better builds and I really don’t know what I did to the body which seemed smooth before it was painted. Print lines and creases plus a bit of distortion have all appeared. I have lost interest now and it will have to do as it is!
Bill Flude Ruston:
One of the local M5-M50 NGM Group members, Bill Flude, started dabbling in 3d cad and printing. He produced a number of Ruston loco designs and very kindly printed 3 different designs off for me. I bought the variations with a view to ringing the changes periodically in operation. As Bill said at the time “you can never have too many Rustons!”. Bill very kindly printed three chassis to go with the bodies which use Tenshodo gears and Nigel Lawton motor and pulleys.
I finally got around to more or less finishing one of these in spring 2023 and ran it very successfully at the Mendip 2023 show. I didn’t take any photos of it at the time as it was very much in ex-works condition. I have tried to tone it down a bit and give it a “not very well cared for” look. Still work in progress but it looks better than the freshly painted version.


The photos show it very much larger than life and reveal where I haven’t sanded down some of the print lines. A mixture of my eyesight letting me down and an eagerness to move on to the painting stage. I have two more to practice on so who knows, I may improve!
Bill very kindly included some notes on cleaning up the prints and some fine grades of wet n dry paper.