Construction
As mentioned above, this was to be a ‘maximum effort’ project, not only in modelling terms but also in respect of ‘hardware’. Strength and reliability were fundamental objectives in the initial design concept. Strong but lightweight baseboards with integral folding legs were constructed, with additional bracing on top to provide a continuous support for the track bed, which was cut from 9mm plywood. Track was hand-built using copper clad sleeper strip and code 80 flat bottomed rail. To improve appearance, the insulating gap cut in each sleeper was filled with ‘Plastic Padding’ and filed smooth. Lengths of half-track were constructed in a jig which spaced the sleepers out over a scale 28 foot rail length with sleeper spacing moved closer together towards the rail joints.
These lengths of half-track were positioned on the track bed and held down using drawing pins while the second rail was soldered in place. The resulting fixed sections of track were carefully removed, degreased and spray painted. Completed track sections were glued in position using white PVA adhesive. Each section was bonded electrically to its neighbour where required. On completion of track laying, the whole lot was wired up and thoroughly tested.
Some of the assembled track had ‘Colin Waite’ etched fishplates (or embossed plastic sheet fishplates for insulting gaps) attached, although after a while sanity prevailed and no further fishplates were added (no one seemed to notice them anyway).

Photo by Len Weal courtesy of Railway Modeller: A Wrightlines de Winton hauls empty slate wagons past the Chapel up to the quarries.
With respect to the track, whilst no representation of wood grain could be applied to the copper clad sleepers, this visual drawback was felt to be compensated for by the robust construction offered by this method. One thing I did endeavour to do was to ensure that soldering of the rail to the sleepers was done neatly and as unobtrusively as possible. If the underside of the rail is tinned beforehand and flux applied to the sleeper, applying a hot soldering iron should result in a neat run of solder going under the rail and appearing on the other side. Removal of the iron by ‘dragging’ back down the sleeper should ensure that no blob of solder is left behind. The resulting joint is far stronger, much neater and uses less solder. Even so rail fixings were conspicuous by their absence and I fitted spikes to my next layout ‘Ashcross’.
Track was ballasted using various grades of granite chippings mixed with shale dust and ash. This was intended to give a reasonable representation of a worn down track bed without having to paint the ballast (and subsequently spoil the effect). This mix was laid down dry and pushed into place using soft brush. Once the desired effect was achieved, diluted white PVA glue (to which a drop of washing up liquid had been added) was applied using an eye dropper until the ballast was thoroughly soaked. The washing up liquid reduced the surface tension and was an essential requirement for such a dusty mix.
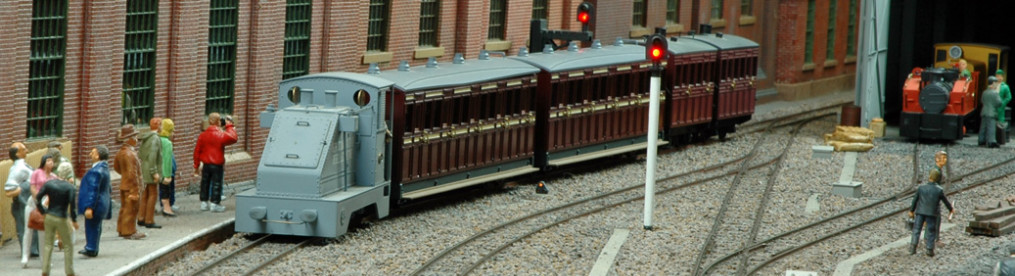
As with everything else, the control system was designed with strength and reliability in mind. This approach certainly paid off since all these basic parts, along with some of the scenery were 8 years old before the layout started to be exhibited properly – but more about this in a moment. Full cab control was provided, allowing two trains to be run simultaneously. This was considered necessary to provide visual interest to a somewhat boring track circuit.
The layout was started in the summer of 1976 and, due to a misunderstanding, was booked for two shows the following year! The exhibition manager at the first show was somewhat alarmed at the final scenic work carried out the Friday evening before the show, but the layout was acceptably presentable and very much improved in time for the next show. In the rush to complete the layout certain compromises had to be made and overall it lacked realism.
At first it was difficult to pinpoint what was wrong but eventually it dawned on me while the layout was being used as a test track for some 4mm scale stock. Ignoring the buildings and people, the layout was essentially built to 4mm scale. This was a most difficult concept to accept; landscape and scenic techniques which appeared acceptable in 4mm scale didn’t look adequate in 7mm scale. The problem, I believe, lies partly in perspective and partly in our own expectations and interpretations of what we see.

A photo of Dyffryn at its first show in the Parr hall at Warrington very kindly passed to me by a fellow modeller on the Narrow Gauge Railway Modellers Forum. the lighting in the Parr hall was not the best and the layout did not have its own lights at that time. It does show how the scenery looks a bit flat and more suited to 4mm scale.
When you look at a 4mm scale building from a distance of say, two feet, this is equal to looking at a real building from about 50 yards away and the brain does not expect to see a lot of detail. It is essentially the same with regard scenery. A birds-eye view of a layout (which is the one we generally see) gives the impression of distance and the whole scene has some sense of distorted perspective. Move to a larger scale and everything looks that much closer. The brain expects to see more detail (individual blades of grass for instance) and the overall sense of perspective is lost unless the layout is vast. This is partly why layouts like ‘Petherick’ or David Rowe’s dioramas are so convincing. The eye is made to look at the display in such a way that perspective problems are reduced. This is particularly effective at exhibitions where such displays provide a stark contrast to the other exhibits. I know that I haven’t explained it very well but I hope you will understand what I am getting at.
The story continues on the Rebuilding page.
Click here to return to the main Dyffryn page.