Andrew Barclay Class A 0-4-0T by Wrightlines

Whilst waiting for enough courage to tackle the Barclay Class E valve gear I had an offer I couldn’t refuse. Russell Wright, the originator of Wrightlines contacted me to see if I was willing to build an 016.5 chassis for a Barclay Class A that he had in exchange for the 014 chassis that it was mounted on. One thing led to another and a number of components arrived in the post. His loco chassis was a pretty straight-forward ‘Pug-u-like’ chassis build with a High Level Models gearbox which placed the motor out of sight above the side tank cut-outs. The 014 chassis wasn’t quite as straightforward as I had hoped and I have actually built a new outside framed chassis using parts supplied by Russell.
I hadn’t done anything like this before as although I was using the frames of an early ‘Pug’ replacement chassis etch, I needed new 20mm wide spacers and a way to assemble a square chassis. I struggled a bit until I realised that the 7mm NGA loco chassis building jig that I bought back in 2018 was based on a section of 20mm aluminium channel.

I used this to set the sides 20mm apart and used the extended axles to set the bearings square (I wasn’t going to try a compensated chassis).

The long clamps supplied with the jig were supposed to be used to hold the coupling rods on the extended axles but I used them on the sides instead as they gave me much better access to square up the spacers and get in with the soldering iron.

I used one of the spacer slots for a length of metal strip before fixing in my 20mm wide spacers as it made aligning everything so much easier.

The next challenge was converting the ‘Pug’ sideframes into a better representation of the full outside frames. I used the whitemetal front frame extensions ‘inside out’ and cut the cylinder block to fit over the now widened frames. The motion bracket now sits in slots and only needed a bit of trimming inside to clear the 14mm gauge wheels.

This meant that I could disassemble it all while I made sure everything worked okay.

Extra details were added to the backhead. A couple of Laurie Griffin water level gauges, a replacement regulator as the whitemetal one was distorted and broke when I tried to fix it and a manifold purchased many years ago when Chuffs sold a number of parts from their Pug kit. The backhead also had a couple of holes in it which I think corresponded to washout plugs. It didn’t seem right to leave them as holes so I have plugged them with Grandt Line moldings. This was painted separately from the loco and glued it in towards the end of the build.


I was worried that the motor would be too long to allow the flywheel but there is just enough room.


I had hoped to get away with using the top half of the boiler but that was above the side tanks so I had to solder the two halves together before cutting out a slot underneath.


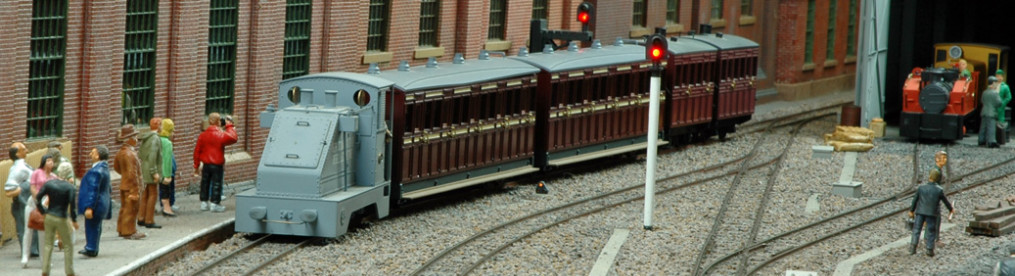
I was struggling to imagine this as a 3ft gauge loco as it is about the same width as the Class E and overall looks to be a bit smaller. As such it will fit right in on Tony’s Forest.


Just a few little things to finish off and overall I am pleased with the result. I particularly like how the backhead turned out although with the driver in place you can’t see very much. I find photos very useful in showing all of the little bits that need attention! Works plates on order from a well known source!
One thing that I have noticed is that the outside frames are very plain but there isn’t any room for hornblock details. I may add a few Grandt Line nut and bolt castings and do something about the rather sharp square edge at the back of the frames. However, it is a good runner so the limited time between shows means that such modifications will likely stay on the back-burner for the time being.
One advantage of a layout with so many trees is that viewers can’t see the loco as close up as my two photos above!
Andrew Barclay Class E 0-4-0WT – S&D Body on a Locos n stuff Chassis
I have had an S&D Models body kit for many years with the intention of scratch building a chassis at some point. I was half hoping that someone would produce a chassis kit but I hadn’t expected to wait for so long! The chassis etchings looked very fine and I was worried that I might not be able to produce a successful model. Luckily one of my friends had built one and was able to provide a few hints and tips to help me on my way.


Looking at what I had done with the body made me think that the injectors were not quite right for the loco that I wanted to portray and that some of the pipework looked a bit over scale. Not that surprising as they are cast in whitemetal so one thing led to another! The injector are cobbled together with tube and wire with some flanges added from a Meridian etched fret purchased many years ago. The drain comes from the back while the water feed is looped from the front and locates into the side of the well tank. That makes for an interesting assembly between body and chassis!


Then Paul Martin very kindly provided photos of Glyder’s brake lever and I thought it was such an obvious feature that I had to try to portray it. I don’t do small parts and have really struggled with these. For an idea of scale, the balance weight is cut from 4mm diameter tube. I am sure it will look better when painted and rusted.


I think the original Class E wheels were 8 spoke. The Locos n stuff chassis comes with Scalelink 13mm 12 spoke wheels which to my eyes look a bit 4mm scale if you see what I mean. I had some Markits 12.5mm 10 spoke wheels which I think are hard to get these days and probably why the kit comes with the Scalelink ones. The crank throw was a bit bigger on the Markits wheels but luckily there was enough clearance for the crossheads.
Further progress will be reported in due course as I am still plucking up the courage to tackle the valve gear and I keep getting side-tracked!


Slow progress during February 2022 but I managed to get the cylinders assembled and trial fitted. These are just pushed in temporarily and are in the optional horizontal position. I will have them in the inclined position when finally fitted. Now I need to pluck up the courage to tackle the very fine valve gear.

I’m getting there with the valve gear but it has been a struggle with the optivisor! I have simplified things a bit in an attempt to provide a bit more clearance. Hopefully it will all work and not be too noticeable.

Most of the valve gear is now assembled and the motion bracket/tank fillers added. I have blackened everything with partial success but hopefully with a little bit of oil it will look suitably workman-like. Still a way to go with this build but I am hopeful that it will be nearing completion before the summer. A lot will depend on how much free time I get, especially as exhibitions are looking much more likely.
Despite plenty of competing jobs I have managed to tackle the final bit of valve gear on the Barclay Class E. One side is the better than the other as I had to adjust the return link on the other side so that the expansion link doesn’t waggle too much (if at all) as I messed up the alignment and if it waggles it seizes against the motion bracket.

The roof isn’t fixed on yet and I need to do a bit of weathering. Getting the body onto the chassis is a bit of a fiddle as I have routed the injector water feed pipes from the side of the well tank and they have to be sprung over the tank top lip. The steam feed to the cylinders is fixed to the chassis and the steam pipe from the regulator on the dome is located by a spigot. The exhaust pipes from the cylinders were glued in to the smoke box after the chassis was fitted and locate in holes in the top of the cylinder block. In theory body and chassis should come apart but I would rather not have to do this too often! I’v just realised that I need to find something suitable for the cylinder fronts as these are very obvious with the front buffer beam cut down to match that of the Calshot locos.

I need to do a bit of weathering and fit the works plates and driver. I’ve tried to get it as balanced as possible with the front part of the boiler and the front part of the chassis filled with as much lead as I could squeeze in. I also ground away a lot of the inside of the cast metal roof too. The 3d printed ModelU driver shouldn’t affect things too much. Then I need to sort the couplings which I haven’t decided on yet. I can’t find anything similar to the Calshot locos and in any case I am not sure that would look right. I’ve seen Russell Wright’s version which is fitted with Motor Rail Simplex style central buffer/coupling pockets which looks about right and probably fits in more with Tony’s Forest stock.
Running trials with just the chassis looked good and test running on the test track with the body fitted also looked good. A trial run on the layout at Narrow Gauge North before opening was not successful. It ran okay for a very short period then went very jerky followed by not at all. I didn’t have the time, inclination or optivisor to look at it until I got home. All the valve gear looked loose and free moving but it still refused to run well under power. A lot of head scratching and fiddling eventually resulted in the rather drastic removal of the valve rods. It ran but everything flopped about in a quite alarming way so new valve rods from much finer wire have been fitted. Unfortunately these look just like the bent bits of wire that they are and I think I need to come up with something better. It is now running quite sweetly so I will probably leave it for the time being and see how it runs on the layout.
It was never going to be a showcase model so maybe my poor attempts will remain. As I have said before, there are certain advantages to a layout where it is quite hard to see the trains! I think I need to start something else but the trouble is the two next in the queue also have walschaerts valve gear.
Here is a poor video of the loco running on the test track after my attempts to fix the valve rods:
I have since added 16BA washers to the bent ends of the valve rods and painted everything black so it is not so noticeable.