Peco Hunslet 0-4-0ST:
I built one of the Peco Hunslet 0-4-0ST kits back in 1989 when the Branchlines chassis became available. This was for O16.5 and ran on Dyffryn Station, Syreford Station and Ashcross Industrial Museum. I have had another kit waiting to be built to 14mm gauge for quite a long time. However, this time I thought I would make a few changes.
The firebox sides have extensions and a stepped cover to clear the original Hornby chassis. These aren’t required for the Branchlines chassis so I cut them off and fitted the stepped cover upside down to give a flat footplate. There are a couple of lugs that have to be removed to make it flush with the rest of the footplate.
My thoughts then turned to the tank and boiler sections. Whilst the flat boiler sections below the tank aren’t very noticeable, I thought I would replace them with a round boiler lower section. The motor is horizontal in the boiler and drives the rear axle through a High Level gearbox and drive extender. It just about fits in the firebox and is pretty much out of sight. I had to mount the round boiler section on the chassis as the motor fitted inside it. This meant that the footplate had to have a section cut out at the front to clear the boiler so that the body can be easily fitted and removed.
I decided that it would be easier to build up the tank before removing the flat boiler sides. I started by fitting the front to the top, taking time to get the fit as good as I could and everything square. This gave me a reference to work back from when adjusting the sides to fit. Trial fitting of the tank confirmed that everything fitted together.
Having the boiler lower half fitted to the chassis presented a challenge as I wasn’t sure how to fit the boiler clack valves. These are attached to the injectors which are part of the body but also, strictly, connected to the boiler which is part of the chassis. I wondered about drilling holes in the boiler to take a spigot off the clack valves but just knew I would forget to disconnect these when removing the body. I decided to reuse the cast clack valves that came with the kit. These are part of the tank/boiler/spring castings, the lower part of which I had already cut off the tank side. After a bit of careful (for me anyway) cutting, I managed to liberate these valves. I realised that they had a bit of an upstand above them and that if I replaced this bit with some wire, I could then locate the clack valve into the bottom of the tank, thus keeping the whole assembly part of the body. It also meant that I could keep all the pipework off the body until it was painted, so I could keep the copper colour on the pipes.
Whilst the loco was nearing completion a test run revealed that the buffer beams, which are deep and wide, fouled some of the dummy point levers, which I had thought I had placed well clear of any rolling stock when I (very) firmly attached them to the base board. Whilst I could adjust them to give more clearance I also found that the buffer beams fouled the fiddle yard alignment bolts. That required a bit of filing to reduce the size of the alignment bolt lever. The main culprit with fouling was the motion bracket which is over wide to allow the outside framed chassis to accommodate 16.5mm gauge. Luckily, I didn’t have to remove any material off the motion bracket itself. I also needed to remove some of the undergrowth too!
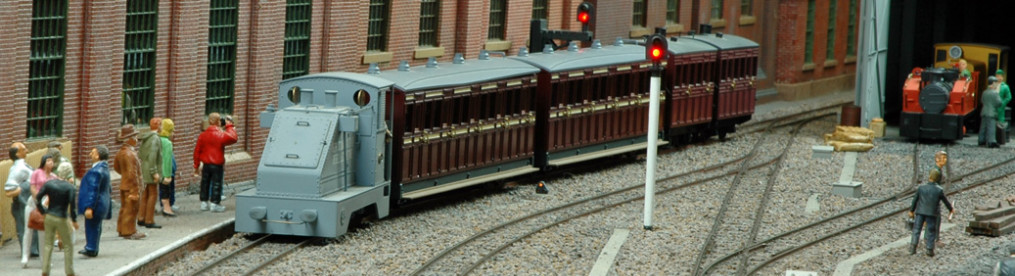
The loco is heavy and needed a bit more weight at the front for balance. It does run beautifully with its weight helping performance on my track. It has become one of my “go to” locos at exhibitions and, with a bit of a loose front coupling, tends to run cab first into the station.
Chivers WDLR Hunslet 4-6-0T:
For far too long I have had a Chivers WDLR Hunslet 4-6-0T in the build pile. Bought from Roger at a show in Leominster in September 2000 with the aspiration to build it to 016.5 for Ashcross, it somehow joined that pile of kits waiting for a rainy day! I remember the show as one of the early ones for Ashcross but more so as it was the beginning of the tanker driver’s strike and fuel was becoming hard to get.
Anyway, I started with the frames during the 2020 lock down but struggled with the wheels due to my own incompetence. They were very nice but I felt more comfortable using some from Mark Clarke (Locos n stuff) from his Joffre kit. These are Slaters wheels and are self-quartering. Things were put on hold when I realised that my sharp curves gave an unacceptable front bogie swing which would foul the crossheads. After a bit of head scratching and re-reading some of the build articles in Narrow Lines (the 7mm NGA magazine) I decided to stretch the cylinder block and also add a couple of wires inside the frames to restrict the swing of the bogie at the rear.


The temporary weight on the back is to counterbalance the cylinder block at the front.


The cab and tank unit is separate from the firebox/boiler unit and the smokebox. It looks like the front of the tanks droop a bit which should hopefully be cured when the tank/cab unit is fixed to the firebox/boiler unit. It’s not looking too bad despite my fears that things didn’t look particularly square when assembling the cab/sides on the footplate.
Trials of the chassis confirmed that the revised cylinder arrangement and bent wire to limit the pony truck side movement at the back worked okay. I crammed as much lead as I could into the pony truck (25g) and it seems to track okay.


I decided to add the very nicely etched brake gear to the chassis. A bit fiddly for me but it should look okay once painted.
The pull rod down the centre of the chassis needed a couple of links to the brake cross shaft so I filed some out of some of the scrap etch. A bit messy with soldering but I don’t think it will be obvious when painted and the body fitted. I wasn’t sure where those links would be so I have put them inboard and close to the pull rod.
I wanted to do as much of the soldering as I could on the chassis before I painted it but there were a couple of areas where I couldn’t fit some of the more vulnerable parts which would have to be glued on.


However, I could fit the wheels, coupling and connecting rods to check if my efforts at widening the cylinder block gave me the clearance I need.
Fitting the brake gear limited the pick-up options but I had a cunning plan for that.
The instructions say that while a brake pull rod has been included “it is unlikely you will be able to use it because of the number of breaks needed”. However, I found it very helpful in positioning the brakes while trying to assemble everything and I only needed to remove the section where the gear wheel goes. It was a bit tight getting the screw for the pony truck pivot under the front brake diamond shaped pull rod but it was do-able.


For the pick-ups I used a bit of double-sided copper clad fiberglass board with insulation gaps cut either side of the frames so I could still solder the board in place. It didn’t need to be double sided but it was what I had to hand. Fortunately the phosphor bronze wire was springy enough on the wheel rims. I know that picking up off the rims is not ideal but the 016.5 PECO Hunslet I have does this and has been okay since the late 1980’s.

Meanwhile I added the details to the back head. A bit fiddly for my capabilities and I decided to add hand wheels to the injectors. These were fine etchings from Wizard Models and I messed up opening up the centre hole to suit the castings. The loco will be modelled in a bit of a dilapidated state so I was not too worried about the crooked hand wheel!

The gearbox drives the middle axle and pretty much everything including the pick-ups are either hidden or masked by the overhang from the side tanks. The boiler fitted better once I had trimmed and fixed the wires to the motor.
The basic loco is more or less finished and runs well. It is a bit big for the layout which is disappointing as I had planned a similar sized WDLR Baldwin. Now I am happy with the running, I need to finish the valve gear – something that fills me with trepidation!
Bachmann Hunslet “Una”

Still to be finished and weathered, this was prepared in time for the FebEx show at Alton in February 2026. Testing at that show indicated that its performance needed improving. Inspection back at home revealed a wonky and out of gauge wheel. I think I have fixed these and testing at the next show in Swindon will show if it now runs on my track!